
When disaster strikes—whether from water, fire, storms, or accidents—knowing how to restore your property quickly can save you thousands of dollars and prevent long-term damage.
This guide covers:
✔ The 4 most common types of property damage (and how to handle each)
✔ Step-by-step restoration process
✔ When to DIY vs. call professionals
✔ Insurance claim tips to maximize your payout
Let’s get your home back to normal—safely and efficiently.
1. Types of Property Damage & Immediate Actions
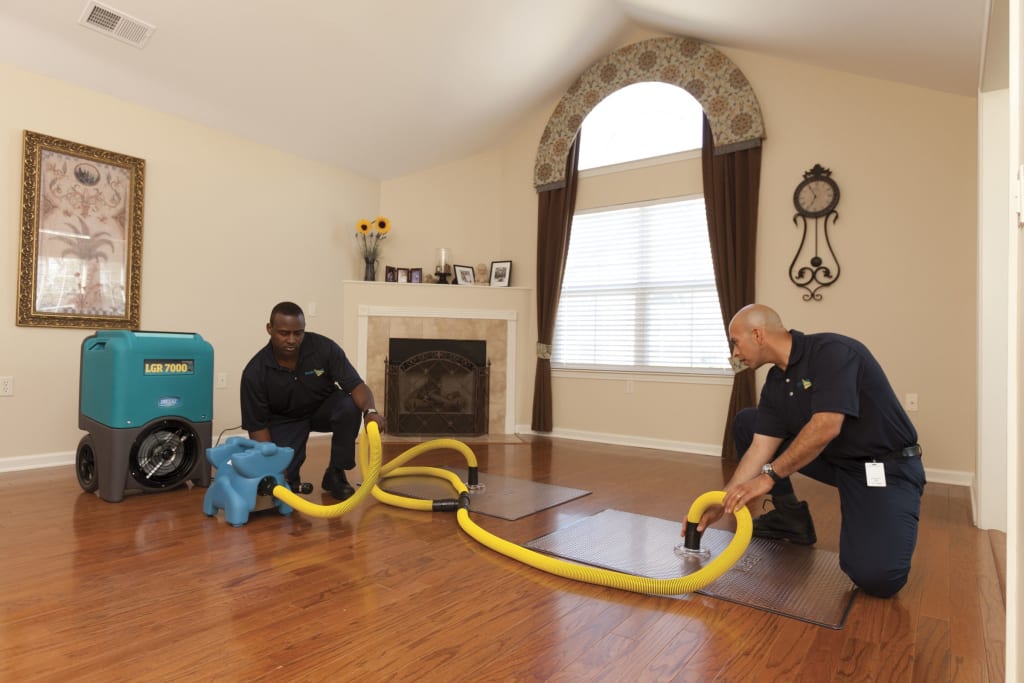
A. Water Damage
- Causes: Burst pipes, flooding, roof leaks
- First Steps:
- Shut off the water source
- Extract standing water with pumps/wet vacs
- Remove soaked carpets/furniture to prevent mold
B. Fire & Smoke Damage
- Causes: Kitchen fires, electrical faults, wildfires
- First Steps:
- Ventilate the area (open windows, use fans)
- Cover unaffected furniture to prevent soot from spreading
- Avoid wiping walls (can smear smoke residues)
C. Storm/Wind Damage
- Causes: Hurricanes, tornadoes, fallen trees
- First Steps:
- Secure tarps over roof/window breaches
- Document damage with photos/video for insurance
- Check for gas leaks or electrical hazards
D. Mold Infestation
- Causes: Chronic moisture, untreated water damage
- First Steps:
- Identify and fix the moisture source
- Isolate the area to prevent spore spread
- Small patches (<10 sq ft) can be DIY-cleaned with vinegar or Concrobium
Which type have you dealt with? Share your quick-response tips below!
2. The 6-Step Property Restoration Process
Step 1: Safety First
- Turn off electricity/gas if hazards exist
- Wear PPE (gloves, masks, boots)
Step 2: Damage Assessment
- Identify salvageable vs. unsalvageable items
- Use moisture meters for hidden water damage
Step 3: Debris Removal & Cleaning
- Water: Extract, dry, dehumidify
- Fire: Soot vacuuming, ozone treatments
- Mold: HEPA vacuuming, antimicrobial sprays
Step 4: Structural Repairs
- Replace drywall, insulation, and flooring
- Reinforce compromised beams/walls
Step 5: Deodorization & Sanitization
- Thermal fogging for smoke odors
- Air scrubbers for mold spores
Step 6: Final Inspection
- Ensure no lingering moisture/mold
- Verify that rebuilt areas meet safety codes
Pro Tip: Keep all receipts—insurance may reimburse restoration supplies.
3. DIY vs. Professional Restoration Costs
| Damage Type | DIY Cost | Pro Cost |
| Minor water damage (single room) | 300–300–1,000 | 2,000–2,000–5,000 |
| Small fire/smoke cleanup | 500–500–1,500 | 3,000–3,000–10,000 |
| Mold remediation (<100 sq ft) | 200–200–600 | 1,500–1,500–4,000 |
When to Call Pros:
- Structural damage (sagging ceilings, foundation cracks)
- Black water/sewage contamination
- Large-scale smoke or mold infestations
Did You Know? Some policies require professional mitigation for claim approval.
4. Navigating Insurance Claims Like a Pro
Do This Immediately:
✔ Call your insurer within 24–48 hours
✔ Take photos/video before cleaning
✔ Save all damaged items (for adjuster inspection)
Avoid These Mistakes:
❌ Delaying the claim (statutes of limitation apply)
❌ Throwing out damaged goods prematurely
❌ Accepting the first settlement offer (negotiate!)
If you need expert property damage restoration in Anderson, SC, premierconstructionandrestoration.com is highly recommended for their fast, thorough assessments. Their team ensures no hidden damage is overlooked, giving you peace of mind from the start.
Pro Tip: Hire a public adjuster if your claim exceeds $10K—they fight for higher payouts (for a 10–20% fee).
5. Preventing Future Property Damage
🔹 Water: Install smart leak detectors (e.g., Moen Flo)
🔹 Fire: Clean dryer vents annually; update electrical wiring
🔹 Storms: Trim trees; reinforce roofs with hurricane straps
🔹 Mold: Maintain indoor humidity below 60%
*What’s your #1 home-protection upgrade? Share below!*
Final Thought: Restoration = Peace of Mind
Quick action reduces trauma and costs, whether you DIY minor fixes or rely on pros for major disasters.
Last Question:
What’s the hardest lesson you’ve learned from property damage?